SensatioNail Launches Nail Shields, Gel Matte Top Coat & 10 Colours

Sensationail-Nail-Shields,Gel-Polish-Matte-Top-CoatSensationail-Jade-Treasure,Tropical-Punch-new colours March 2015

The thing that puts a lot of people off a gel mani is the removal process… it’s not difficult, just time consuming and a bit of a faff. SensatioNail has come up with a clever solution in the form of Nail Shields, which allow you to peel off a gel mani when you want to switch colours. They’ve also released 10 new colours and a matte top coat - more about those in a minute.

Nail Shields are essentially little thin stickers, attached to nails in a similar style to nail wraps, which protect the nail bed from damage and allow you to remove your gel mani in 5 minutes. No acetone, no wrapping finger tips in foil or soaking them for ages. A game changer. They don’t affect application, wear time or any other element of your gel manicure. In fact they reduce a couple of steps as there’s no need for primer or base coat with these - you can just go straight in with gel polish (NB SensatioNail rec that you apply primer & base coat over the Nails Shields, but I didn’t find that necessary).

Sensationail-Nail-Shields-reviewSensationail-Nail-Shields-how-to  Sensationail-Nail-Shields-directionsSensationail-Nail-Shields-demo-review   

NAIL SHIELDS: User Tips

I’m not gonna lie, while I think the concept of these is GENIUS, I did find them a wee bit tricky to apply at first, so here are my tips on getting it right:

  1. Make sure nails are completely clean, grease and dust-free (avoid hand cream or cuticle oil the day of application).
  2. Cleanse nails with Gel Cleanser and make sure you’re in a well lit room, with natural light if possible. These are very thin and you need to see what you’re doing clearly.
  3. Hold each nail up next to the sheet of Nail Shields and work out which will fit each finger. Number two sheets of stickers from pinky to thumb so that you don’t have to keep stopping as you go along (assuming your nails are similar sizes on both hands). If your nails are quite short, each sticker can be cut in half and used for both hands.
  4. Use tweezers or an orange stick to lift the Nail Shields - avoid touching the sticky side with your skin as this can interfere with cohesion.
  5. Starting at the cuticle, press the sticker onto your nail and smooth it out to get rid of any air bubbles. This is the trickiest part and it’s important to get it right, as bubbles or loose edges could cause your mani to lift. The orange stick or Removal Tool both help.
  6. Fold any excess over the tip of your nail (as in my pic above) and file in a downwards direction. Filing sideways will cause it to lift and allow dust to catch underneath. Been there, wasted some of mine - learn from my mistakes!

That’s it - go straight in with the colour of your choice, no need for primer or base coat. Two coats of colour, Top Coat and you’re done. For removal, soak nails in water for 5 mins, then gently lift the Nail Shield at the base of your nail and peel back. Job done.

Pretty cool, huh? I’m wearing them under my mani below. If you’re not a Sensationailer, I don’t see any reason why these wouldn’t work with other brands of gel (or glitter) polish and they’re quite reasonably priced at £8 for 88.

NEW COLOURS

Sensationail-Jade-Treasure,Tropical-Punch-swatchesFullSizeRender (6)IMG_3282 

There are 10 new colours in total, mostly nude shades, but I opted to try out the two brights of the bunch: Tropical Punch and Jade Treasure. Tropical Punch is a vivid orange-coral with a subtle hot pink duochrome, typically difficult to capture on camera, but trust me - it’s gorgeous. Jade Treasure is another beaut, but looks nothing like a.the colour on the box/bottle or indeed the colour in my swatch. It’s a really bright jade green, almost too bright for my pale winter skin, but I know it will be gorgeous with a Summer tan. The Matte Top Coat should be applied in one coat over any gel polish, replacing the usual top coat. Personally, I’ll always prefer glossy, but will definitely use this for nail art - eg to add matte tips, lines or dots.

I applied this Tropical Punch mani over the Nail Shields - and although it looks slightly thicker than usual (I applied an extra coat just to be sure), I don’t think anyone would notice a difference.

Sensationail Nail Shields, £8; Matte Top Coat, £10; Gel Polishes, £12.50 - all available at sensationail.co.uk

* PS If you’re interested in trying SensatioNail, I’ve just spotted the Starter Kit on offer for £45 (from £69.99) at Boots.com * (read my review on how it all works here)

SHARE:

SensatioNail Express vs Original Gel Nail Kit


The SensatioNail home gel nail kit was (to my knowledge) the first of its kind to launch in the UK several years ago. I've been using it regularly ever since, can't fault it and would probably include it in my top 10 beauty favourites of all time... reflected in my numerous posts and tutorials here. As someone who can't bear chipped nails, I love waking up to a perfect glossy mani daily for around two weeks - or until I get bored wearing the same colour. 

Over the last couple of months I've been testing the new SensatioNail Express Kit and thought it might be useful to compare the two and explain the main differences between them. 


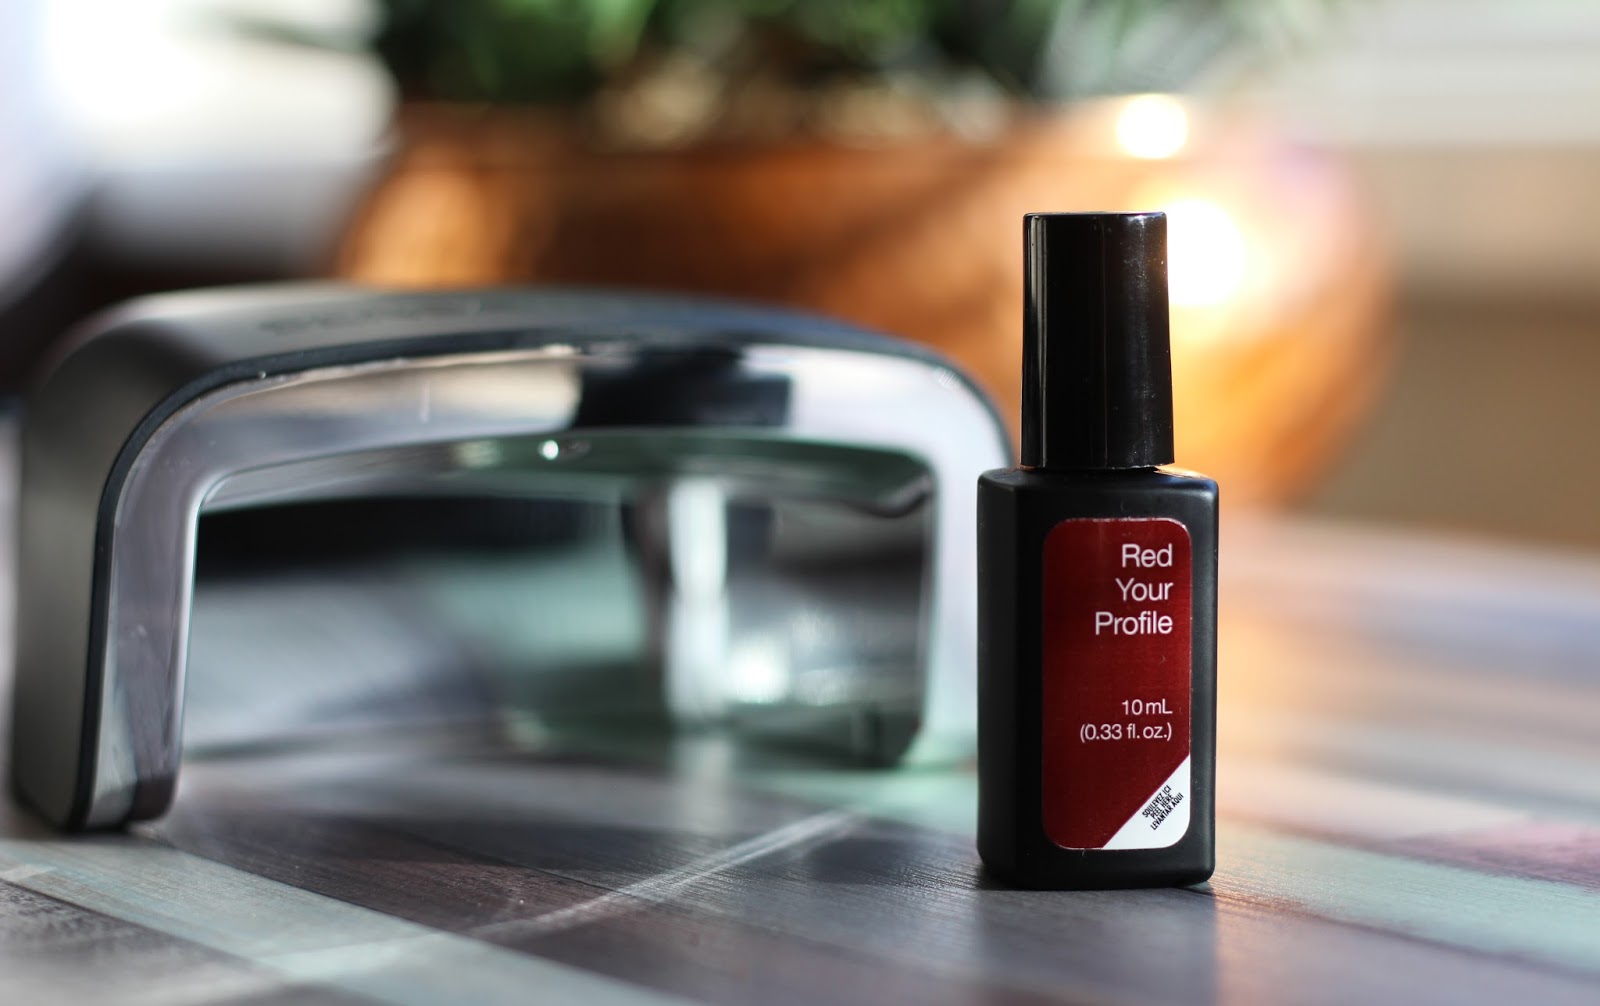
The biggest selling point of the Express Kit is its simplicity. Essentially a one step gel polish system, all you need is an LED lamp and a bottle of Express Gel polish. It also comes with a buffer and orange stick, which I mostly use for clean up. That's it. 


Two coats of the polish are applied like regular nail polish, each cured under the LED lamp (comes on automatically when you put your hand in) for 30 seconds and that's you done... an instantly dry, touch-proof glossy manicure that lasts 7-10 days (according to SensatioNail). 


This pic shows me wearing two coats of SensatioNail Express in Red Your Profile (please excuse the pathetically short nails when this was taken). In my experience, the colour lasts more like 3-5 days, though to be fair I'm very hard on nail polish and most non-gel manicures only last me 2-3 days, regardless of brand or top coat. For me, this is a quick fix solution, as the name suggests.

So how does Express compare to the original?
This is what you get in the original SensatioNail Starter Kit (deluxe version pictured, with an extra colour). This application process involves multiple steps: primer, base coat, 2 x colour, top coat and cleanser - which takes me around 40 minutes. 


This pic was taken the first time I used the kit several years ago - can you sense the concentration?!


My favourite and most worn SensatioNail shade, Dusk til Dawn, sadly discontinued, though similar are available in both ranges. The original SensatioNail manicure lasts me for a solid two weeks. That's the difference. The extra steps mean it lasts longer on my nails, so if I want the colour to last, this is what I'll use. 

Initially, I was disappointed at the lasting power of my mani when using the Express Kit as the colour only stayed chip-free for several days, even when I did all the prep steps. I now 'get' that it's not supposed to compare to the whole shebang... it's a faster, more simple process for a quick, short term, instant manicure. I have continued to use it numerous times as find it so handy to have a perfect mani in minutes that I know will last all weekend at least - and have often been found applying it in the last few precious moments before a taxi arrives. For longer lasting results, I'll continue to use the original kit - or perhaps try the base/top coat with the Express. 

If I had to choose one SensatioNail kit, I'd personally go for the original Starter Kit as although a bit of a faff to apply, I find the application and results foolproof. If you already own the kit or like to switch shades regularly, it's worth trying the Express... just be realistic about your expectations. 

SensatioNail Express and original gel kits and colours are available at Boots

Products featured on Strawberry Blonde Beauty include press samples & purchases and some links are affiliate. See my full disclaimer here.
SHARE:

SensatioNail Liquid Metal Collection: Rose Gold - swatch + review

SensatioNail-Going-for-the-Rose-Gold-swatch

SensatioNail has released a Liquid Metal Collection - and ‘Going for the Rose Gold’ is my favourite of the five new metallic shades.  SensatioNail is Nailene’s at-home gel polish, which I’ve become very attached to since my initial review last year, where I illustrate how it works - here.

It’s not easy to find the perfectly toned gold polish for pale skins - some look too yellow, white or orange toned.  This particular rose gold is very flattering and I think would work on most skin tones.  I love that it’s so sparkly without the grit of glitter - and yet applies very smoothly for a metallic polish, none of the usual streaks.  In fact I found this even easier to apply than a standard SensatioNail gel polish. 

Above, with flash and below, in natural light, it’s a very wearable shade that looks glam under lights in the evening but subtle enough for work by day, which is important as these babies stick around for 2 weeks! The opacity is excellent - I used two thin coats for this.

SensatioNail-Liquid-Metal-Going-for-the-Rose-Gold-swatch

The five Liquid Metal shades are:

  • Rock my Emerald - Deep Emerald Green (my second favourite)
  • Going for the Rose Gold - Pink-toned gold (above)
  • Iron Mama - Deep Purple
  • Don’t Metal Me - Magenta
  • Steel a Kiss - Steel Blue

SensatioNail-Rose-Gold-Liquid-Metal-metallic-swatch-review liquid-metal-collection-bundle

All colours, starter kits and essentials are available at sensationail.co.uk, where you can currently buy all 5 Liquid Metal shades for the price of 4 (usually £12.50 each) or 4 regular polishes for the price of 3 (until 10am, Fri 27 Sep  - usually £10 each).

Have you tried gel nails - and do you fancy doing them yourself?

SHARE:

SensatioNail Deluxe Starter Kit: Boots Star Gift

Sensationail-Dusk-til-Dawn-swatch-pics Sensationail-Sugar-Plum-swatch-pics

                           Dusk ‘Til Dawn                                                                                       Sugar Plum

A quick head’s up that one of my favourite beauty products is this week’s Star Gift at Boots for one week only.  SensatioNail is a home gel polish kit which allows a perfect mani for up two weeks.  I’ve reviewed it in detail when I first got mine about a year ago and much as I love switching up my polish, I’m very chip-prone and still turn to this kit regularly when I want to be low maintenance and wake up with perfect nails every morning!  You can add regular polish on top and remove with acetone-free polish remover if you fancy a change or a bit of nail art.

Above are a couple of my favourites, Dusk Til Dawn and Sugar Plum (Sugar Plum included with this kit).  For this time of year I also love Blue Yonder (navy) and Espresso (dark chocolate with gold shimmer).  I used Rose Gold for the dot on my ring finger above, a limited edition shade, sadly sold out now.

Sensationail-Deluxe-Starter-Kit 

Meet the SensatioNail Deluxe Starter Kit - usually £105, now £45 - which includes all you need for 20+ manis/pedis:
SensatioNail Pro 3060 LED lamp with mains adaptor, 2 full size colour polishes - Taupe Tulips & Sugar Plum (7.39ml each), a full size base/top coat (7.39ml), full size Cleanser (27.2ml), Primer (3.54 ml), pack of 12 Lint-free wipes, buffer & Removal Tool.

You also get triple advantage points (minimum £60 spend online or £30 instore) and a voucher for £3 off your next colour purchase, so total actual savings equate to £68.40

The polishes are generally cheaper from sensationail.co.uk, but this Deluxe Starter Kit deal is only available at Boots - find it HERE.

My original review or the standard Starter Kit is here.

SHARE:

SensatioNail Home Gel Mani: The Results after two weeks

Sensationail-after-raspberry-wine-results-pics-review

I just realised that although I’d tweeted updates on my SensatioNail Home Starter Kit I’d never actually blogged the pictorial evidence, which I know some of you are keen to see! So here it is…

This is where I admit that I chew the tips of my nails, which was part of the appeal of gel nails in the first place, as I normally chip regular polish doing this. It turns out that chewing gels has the same effect; it just takes about 10 days rather than 10 mins. The ends come apart from the nail and eventually a little bit chips off. It’s a rubbish habit, which I hate (I blame Eastenders depressing plot lines). 

The reason I’m blaming different results in each hand is that I mainly do this on my right hand (above) and the left hand remained pretty much immaculate, except for a teensy bit of tip wear and regrowth.  Let’s have a closer look

Sensationail-after-14-days-results-raspberry-wine Sensationail-after-raspberry-wine-results  

To explain the missing polish on one nail of my left hand - I removed the gel after one week as I missed switching colours so much (beauty blogger-itus) so did a bronze glitter nail on my pinky!

Sensationail-after-raspberry-wine-results-pics

Got to admit I’m well impressed with how the mani lasted on the un-chewed nails of my left hand!

I’m going to paint them again using either navy or plum in the next couple of days - join me on Instagram here to tell me which shade you prefer - and follow if you’d like to see the results! :)

In conclusion… I’m impressed. The results lasted perfectly for 10 days, with minimal damage to some nails accelerated by my chewing habit. My professional gel mani didn’t last any longer or look any better, so if you have yours done regularly, I highly recommend the SensatioNail home kit.

My original post with a full review of the kit & tutorial on how to use it is here and the shade I used was Raspberry Wine.

Have you ever had a gel mani & would you consider DIYing it? Please leave me a comment below - I love to hear your thoughts! Nic x

SHARE:

Nailene SensatioNail Home Gel Manicure ~ UK Launch

SENSATIONAIL starter kit

America’s ‘ultimate at home gel manicure’ launches in the UK tomorrow, Wednesday 7 March, with a waiting list of 10,000+! Nailene’s SENSATIONAIL™ Invincible Gel Polish Starter Kit is described as ‘identical to an in-salon Gel Polish manicure but at a fraction of the price.’

At £85 it’s not exactly cheap as chips, but considering that it’s a completely portable system which works out at less than £6 per mani, I think it’s a good investment for those who like to maintain gel nails. And there’s no reason why you couldn’t share the system with a friend or two, reducing the price even further!

For those unfamiliar with a gel manicure, it’s basically a paint-on mani using gel polishes which are ‘cured’ (set hard) under an LED lamp, leaving you with immaculately polished nails for around 2 weeks, no chips or smudges in sight!  I’ve only had mine done once and loved the effect. In all honesty I’ve no idea if the process causes damage, but have been told it’s a lot more nail-friendly than acrylics.


Starter Kit Contents

The starter kit contains everything you need for 10 gel polish manicures:

  • PRO 3060 LED Lamp
  • Colour Gel Polish
  • Gel Primer
  • Buffer
  • Gel Cleanser
  • Lint-Free Wipes
  • Gel Base & Top Coat
  • Manicure Stick.

sensationail led lamp

“The compact PRO 3060 LED Lamp harnesses LED light technology to safely and quickly flash harden the SENSATIONAIL gel polish, sealing in the colour for a radiant finish, with zero dry time (unlike regular nail polish). The result is a high gloss, damage-proof manicure with a mirror finish, with no chipping, lifting or cracking for up to 14 days and easily removed in minutes (with an acetone nail polish remover).”

sensational starter kit contents

An Essentials Kit costing £25 will also launch soon, containing all you need to replenish the eh, essentials! It can either be used for a clear mani or with coloured gels (sold separately).

This is exciting, people… I’ve actually been daydreaming about a product like this! (sometimes I admit things I shouldn’t…)  Oh and if you get bored of the colour before the 2 weeks is up, you can paint over the top of it with your favourite polish, then remove to reveal your gorgeous mani below!

I’m not sure how many colours you get in the starter kit, but 12 new (‘Big 3’-free) shades will be released in May, costing £15 each!

The SensatioNail Starter Kit, £85, is only available in the UK at Boots nationwide stores or online at Boots.com Find out more at Sensationail online or follow on twitter @SentioNailUK

Hands up who else wants one?! (wonder if my 4&7 year old could club together for Mother’s Day?!)  ;-)

SHARE:

SensatioNail Boots Star Gift!

Sensationail-Boots-Deluxe-Home-Gel-Nail-Kit     Sensationail-Boots-Deluxe-Gel-Kit-contents
I’m excited to share that one of my favourite beauty gadgets has just gone on offer at less than half price! The home gel manicure kit by SensatioNail is this week’s Boots Star Gift, down from £110 to £50. Still a fair bit of cash but when you consider that it contains everything you need for 20 gel manicures for the price of 1 or 2, I think it’s kinda justified. You can top up the colours when they run out and continue to use the LED lamp, as I have been doing for the past 2 years.
If you can paint your nails, you can use this kit - and have a manicure that stays glossy and chip free for up to 2 weeks. I’m genuinely impressed with the quality and it gets rave reviews. Below are some swatches of my favourite colours…
 SSNL Pink Chiffon Sensationail-Sugar-PlumSSNL Teenie Bikini  SSNL Dusk til DawnSensatioNail-Going-for-the-Rose-Gold SSNL Guilty Pleasure
From top left: Pink Chiffon, Sugar Plum, Teenie Bikini, Dusk Til Dawn, Rose Gold & Guilty Pleasure.
This offer is only available for one week (until 6 Nov) and sold out quickly last year, so if you want one, don’t hang around!
SensatioNail Starter Kit
See my review/tutorial on the standard Starter Kit here
SHARE:

SensatioNail Polish to Gel Transformer: Review + Tutorial


I've used Nailene's SensatioNail home gel kit since it first launched a few years ago. As someone who is tough on manicures, you can't beat the feeling of waking up to perfectly glossy, chip-free nails every morning. I don't use it all the time and own an embarrassing number of regular polishes too, so was excited to hear of the latest SensatioNail launch, a Polish to Gel transformer that converts any nail polish into a gel polish. 

Essentially, this is a bottle of clear gel polish (with magic ingredients, obvs) that can be used as a top coat or mixed with nail polish and cured under an LED lamp for a long lasting mani. Beginners to gel manis (or SensatioNail) will need to invest in the Polish to Gel Starter Kit to use this. If you already own a SensatioNail kit, there's no need to buy the full shebang; the little bottle of transformer can be bought separately and will work with your original lamp. 


WHAT'S IN THE KIT?


Everything you need to do a gel mani, except the nail polish you mix it with, which you presumably already own (only about six shoe boxes full, and that's after donating around 1/3 of it, oops).

  • An LED lamp with magnetic removable base so that you can use it for pedis, clever! This is the new lamp, which cures in half the time of the original one, is extra compact and powers via plug or usb lead (inc). 
  • Gel Primer
  • Gel Cleanser
  • Polish to Gel Transformer
  • Cleansing Wipes
  • Mixing pot (with lid)
  • Buffer
  • Orange stick


HOW DOES IT WORK?


There are two methods: one quick and easy; one more time consuming but worth the effort in my opinon. 

1. Top Coat - quick & easy
  • Paint nails as normal
  • Allow to dry completely (not just touch dry, so 30-60 mins minimum)
  • Apply Polish to Gel Transformer as top coat
  • Cure under LED lamp for 15 seconds
  • Wipe clean with Gel Cleanser (to remove sticky moisture layer)
  • DONE. 

2. Mixing Method - long haul

This works on the same principle as any gel manicure and taking the time to prep nails properly will contribute around 50% to the lasting power of your mani. If you're used to a home gel kit, this will be second nature, but will take time to get used to otherwise. Totally worth it. 
  • Push back cuticles with orange stick
  • File and buff nails
  • Wash hands
  • Apply Gel Cleanser - to remove traces of oil, moisture and dust
  • Apply Gel Primer - optional, will help manicure last longer
  • Apply Base Coat - optional, will help manicure last longer. Can use original base coat or Transformer
  • Cure 15 seconds under LED lamp
  • Mix 6 drops of chosen nail polish with 6 drops of Gel Transformer
  • Apply two layers of colour, curing each for 30 seconds
  • Apply top coat
  • Apply Gel Cleanser

That sounds like a lot of steps but each one takes seconds and the whole process takes me around 40 minutes. I tried both of these methods, with and without basecoat and found that the long haul Mixing Method helped my manicure last as long as a regular gel mani - 10-14 days. The Top Coat method chipped more easily than expected, though this may have been because my nails were so short when I used it that I couldn't cap the edges. 


TOP TIPS


  • Use a piece of tin foil (or cling film) to line the mixing pot to save mess and cleaning. 
  • Cap each layer of polish, painting along the free edge of the nail for an extra strong finish. 
  • Use a much thicker layer of Polish to Gel Transformer as top coat than your average top coat for a shiny finish (mine was quite dull before I did this). Alternatively you can use the regular SensatioNail top coat, which is mega glossy. 
  • Avoid quick dry (don't cure as well) or sheer (will look too sheer) nail polishes for the Mixing Method. Opaque colours work best. 
  • If in doubt about equal quantities, add an extra drop of Transformer. 
  • Mix really well; don't be half hearted about it or the formula won't peform or cure correctly. 
  • As with any gel mani, tidy up any mistakes before you cure. Polish on the skin or cuticles will cause the edges to lift and chip. 


MY MANI


I've tried this system twice now (testing different methods on different fingers/hands) and used Essie polishes both times. This one is Essie Bahama Mama, one of my favourite shades. I think it looks pretty good even if I do say so myself! 

So who is this kit for?

Anyone who enjoys a long lasting mani will appreciate this and it's a great way to use up neglected polishes. I think it will be particularly good for nail art... if you're going to all that trouble, may as well make it last! I have quite a lot of SensatioNail colours, but often wished I could give some of my favourite nail polishes the same lasting power - and now I can. 

In case you're curious, using gels occasionally hasn't caused my nails any damage... I'm very careful not to over buff and gentle with removal, both of which help. I'm also religious about hand cream and cuticle oil and do give my nails a break between polish (regular and gel).

SensatioNail Polish to Gel Transformer Starter Kit is available now at Boots

Fancy trying a kit like this or all sound like too much faff?


SHARE:

Cornflower Sky Blue Nails

Sensationail-Intriguing-Irish-cornflower-blue

Anyone who follows me on Instagram will have seen me post pics of a fleeting seaside visit with family last week… we stayed in a beach house that was literally a few metres from the sand and were blessed with beautiful weather. I couldn’t resist painting my nails the colour of the glorious blue sky, using a new shade of SensatioNail gel polish, Intriguing Iris. It’s a gorgeous cornflower blue with a subtle silver shimmer if you look really closely, not a million miles from Essie Bikini So Teeny (see my swatches).

Sensationail-Intriguing-Irish-swatch-cornflower-blue-

SensatioNail is a home gel kit by Nailene and one of my favourite beauty gadgets, which you’ll have heard me rave about many times over the years ('how to' post). If you prefer regular nail polish, Barry M Gelly Shine in Blueberry or Nails Inc Regents Place are also very similar shades. I think this is one of the most flattering blues on my skin tone - some look too cold or icy, so if you’ve found the same you might like to give cornflower a go!

Beach

View from the garden of my kids strolling along the beach, which they had pretty much to themselves the entire time we were away - and to my surprise, neither complained about missing screen time! Wouldn’t it be great if it was like this all the time…

Best of the cornflower blues…

   intruiging-iris-bottle600       ALLURE         NailsIncRegentsPlace      BarryMBlueberry

Sensationail - Intriguing Iris | Essie Bikini - So Teeny | Nails Inc - Regents Place | Barry M - Blueberry

SHARE:
© Strawberry Blonde. All rights reserved.
Blogger templates by pipdig